Extend your wifi with open source wifi mesh on OpenWRT
Table of Contents
Instead of spending hundreds on a wifi mesh, diy your own in 20 minutes at a fraction of the cost. You can pick up decent used routers as low as $5-$20, just make sure you find the device your looking at in the supported device list.
Check for mesh mode support
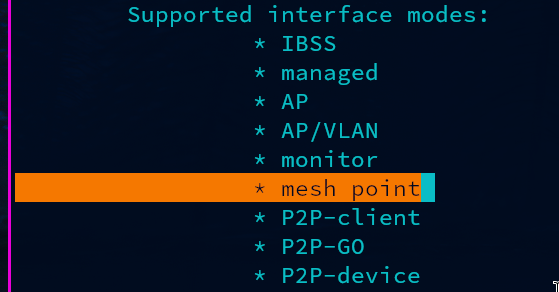
Make sure the device supports mesh mode. SSH into the device and run
root@OpenWrt:~# iw list | grep -C 10 mesh
Installing the wifi mesh package
Backup your configs if you’re doing this on your main hardware! Proceed at your own risk
Wifi packages are named wpad. Let’s see what we come up with.
root@OpenWrt:~# opkg list | grep wpad
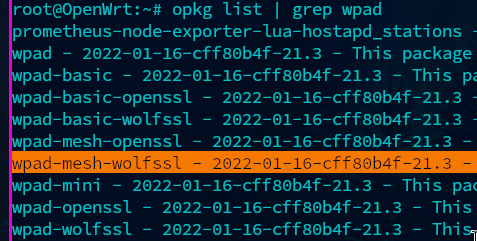
Here we see wpad-mesh packages. I’m going to be using wpad-mesh-wolfssl since wpad-basic-wolfssl was installed by default.
You can check the default installed package with
root@OpenWrt:~# find / -iname '*wpad*'
or look in the web gui under system > software.
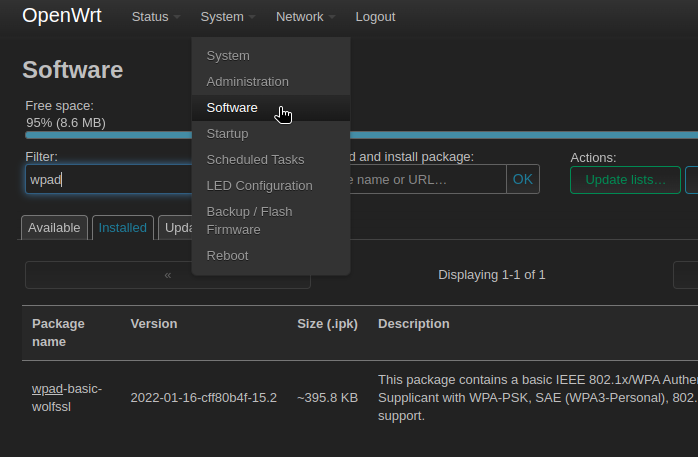
I’ll be removing and installing on the command line but this can also be done in the web gui.
NOTE Make sure you remove the old wifi package, otherwise there will be a conflict. Also make sure you have a wired connection, this will kill the wifi.
root@OpenWrt:~# wifi down
root@OpenWrt:~# /etc/init.d/wpad stop
root@OpenWrt:~# opkg update
root@OpenWrt:~# opkg remove wpad-basic-wolfssl
root@OpenWrt:~# opkg install wpad-mesh-wolfssl
root@OpenWrt:~# /etc/init.d/wpad start
root@OpenWrt:~# wifi up
NOTE Reboot the router if you handle package management in the gui. We didn’t need to reboot while on the command line ;).
Setup the mesh
In the gui, go to Network > wireless and add a new network under the radio you want to use.
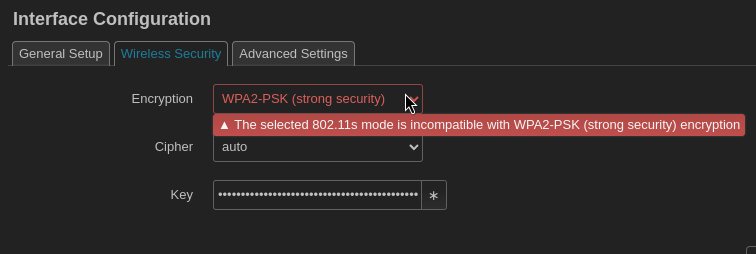
Interface configuration mode is 802.11s and give it a name.

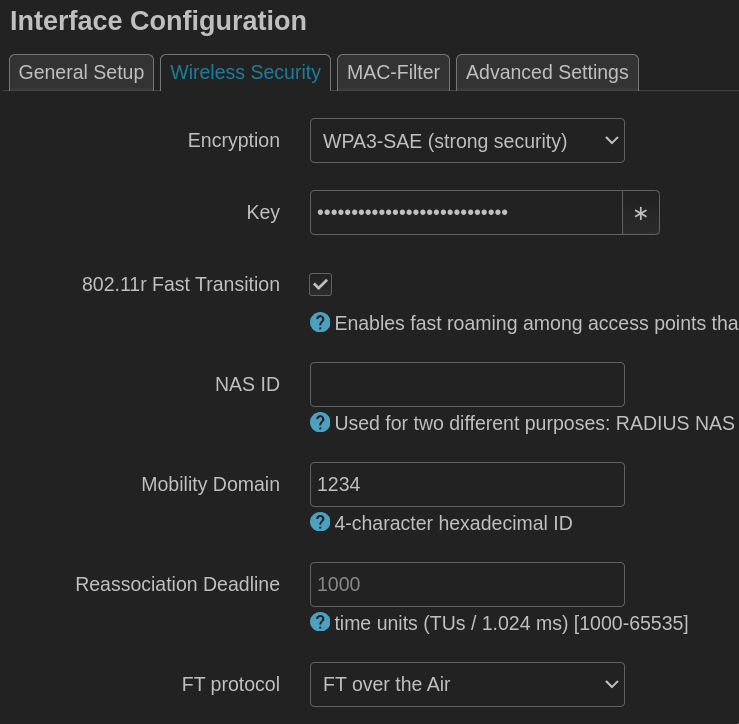
Under security the only available options for encryption is WPA3-SAE or none.
NOTE It’s possible to use WPA2 and add SAE manually, but I will not being covering that here.
Configuring the second wifi router
Unplug your cable from the first device and plug into the LAN port of the second device.
We now need to change the IP address of the second device from the default 192.168.1.1. Go to network > interfaces and select edit in the LAN column.
You can either use DHCP protocol to allow the second device to get an IP address from the first, or set a static address manually. I’m going with static.
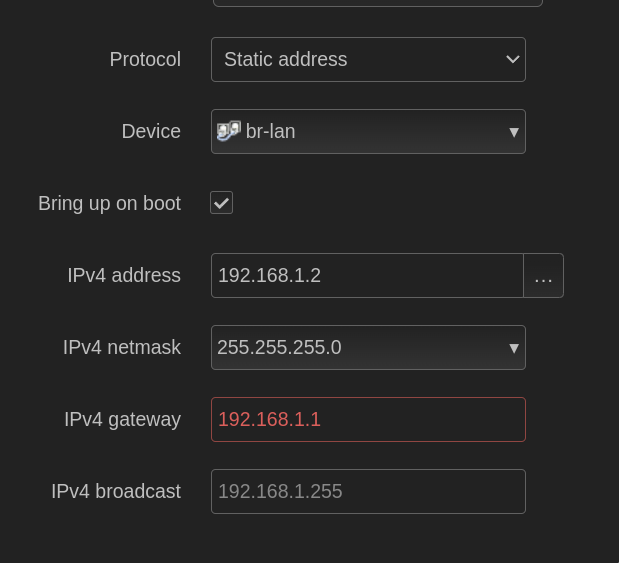
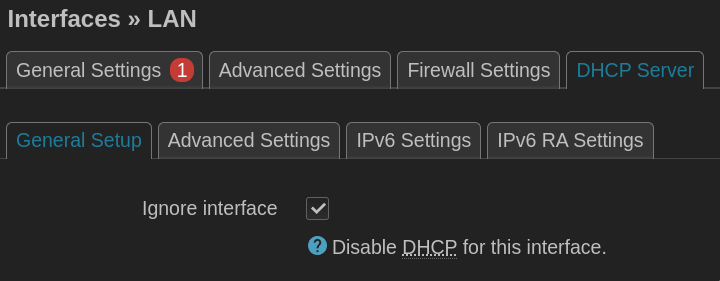
Using a static address requires disabling DHCP by selecting ignore interface
NOTE: If you used dhcp, after saving and applying changes, connect the two devices together by the LAN ports and visit the address of the first device (default 192.168.1.1) to find the IP address of the second device. It should be listed on the main page under
active DHCP leases.
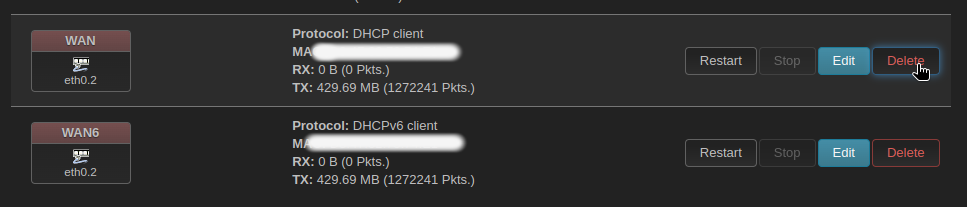
I’d like to remove anything that we don’t need on the second device since it’s being used as a dummy wifi access point. We can delete the WAN interfaces, disable DHCP, DNS, and the firewall.
Network > Interfaces and delete WAN and WAN6
Network > Firewall and delete zones

System > Startup stop and disable DHCP, DNS, and Firewall.

Setup wifi mesh on the second device
Now do the same steps that were done on the first device. Remove the original wpad package, install wpad-mesh, go to Network > Wireless and add the mesh with the same band and channel. After clicking save and apply you should see the mesh point under Associated Stations on the wireless settings page.
Next remove the cable connecting the two devices and check if you can ping from the second device to the first. This can be done over ssh or under Network > Diagnostics. Then try to ping openwrt.org to check for internet access. If this works, the last step would be to setup a wifi network on both devices.
NOTE if you chose to use DHCP on the second device, since we’re now connected over wifi mesh rather than ethernet, the IP address of the second device may have changed.
Here I’m using 802.11r fast transition for roaming among access points. Set a mobility domain, and select FT over the Air.
If everything was done correctly, the second device should now be able to run as a dummy wifi mesh access point with fast roaming. You’re wifi clients should now be able to seamlessly jump between access points depending on what’s in range.